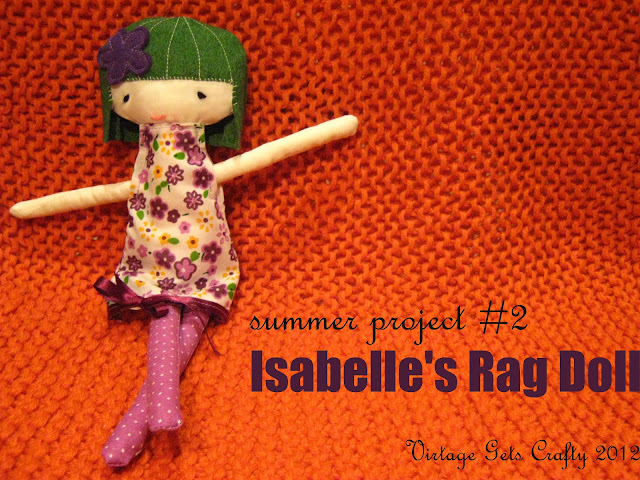
The first birthday of the season was Isabelle's (happy birthday, cutie!), and this is what I made for her:
The inspiration with this doll was provided by the incredibly cute and neat dolls PinkNounou makes, I fell in love with them straightaway when I found them on the Internet! This is my own version, and although I have used for the basic doll-making Miss Gioia's tutorial, I have modified it considerably, especially in the embellishments.
I have used fabric I had at home, trying to match the colours. For the doll's body, I have used a white cotton fabric. For the hair, I have used felt. I also embroidered the face features and the letter "I" on the doll's tummy, so if you want to make this doll, you'll need some embroidery thread as well as the standard one.
Here it is step by step what I did:
First of all, I have sketched what I wanted the doll to look like.
I then transferred the main body parts to the white cotton fabric, following the instructions of Miss Gioia's blog.
I then cut the pieces TWICE, leaving some allowance for the seam. Later in the project, I decided to make the legs in a different fabric, as if she was wearing tights...Next time I might also do the body that way, as if she is wearing a colourful top.
I embroidered the facial features, using padded stem stitching, starting from the eyes. I wanted her to have a sweet, if not a little bit sad, expression...
Then, I embroidered the mouth, using simple chain stitching.
Once the face was finished, I have marked the letter I wanted to embroider on the doll's tummy, like a little tattoo. Remember Toys Story, and the toys marked by the child with his own name? I wanted to make this doll unique and also wanted to make sure the younger sister of this child doesn't claim it as hers one day!
...and this is the letter, embroidered with a double-coloured thread.
Following the tutorial, I sewed the head and body, front and back, as pictured.
 As said earlier, at one point I decided to have the legs made in a different fabric. Once cut, I sewed them and the arms, right sides facing, all around, leaving the upper part open for turning and stuffing.
I then (with quite a bit of effort given the width of the limbs!) turned legs and arms inside out, stuffed them firmly and set them aside.
The hair now: I cut a felt bob for my little beauty to frame her face, and I left some seam allowance.
 I then sewed some decorative curves on the front of the bob, and cut a little felt flower to apply on the air.
 I then stitched the flower to the front of the bob, and cut off any excess thread from the decorative curves.
I sewed together the front and back of the bob, right sides facing. I then turned it inside out and put aside.
As per tutorial, I then basted the arms...
...and legs of the doll.
Next, I sewed together the front and back of the doll, right sides facing, from the left leg up and all around to the right leg. I left the bottom of the body open for turning and stuffing.
I then turned the doll inside out and started stuffing it. At this point it looked a little like E.T. and I wasn't sure how the final result would turn out, but I had faith and continued to stuff the doll!
I then stitched the bottom of the body and secured the legs.
The dress: I cut 2 trapezoidal shapes for a simple summer dress, and stitched a piece of ribbon at the bottom of the back. On the front, I have applied the ribbon to tie a bow as pictured .
Right sides facing, I sewed the two parts of the dress, stitching them together only up to the under arms. I had previously sewn the seam allowance of the upper parts of the dress on each side as pictured.
I put the dress on the doll, and hand-stitched the upper part of the dress to the neck of the doll, up to the arms, both on the front and on the back.
Lastly, I hand-stitched the hair to the head using blanket stitching from one side of the face to the other one.
This way, the dress is attached to the doll but can be lifted to show the pretty tattoo on her tummy!
I also wanted to wrap up my present nicely, so I came up with this final touch.
I hope you enjoyed my "sort of" tutorial, please show me your creations if you do make a similar doll!
Have a lovely week and enjoy the sunshine x


No comments:
Post a Comment