Still on the theme of toys made with simple household materials, let me introduce you to a new friend for my (not so) little sister...Mr Tango, the sock monkey!
I pinned the sock monkey tutorial ages ago, but never made any sock monkeys because for some reason I didn't think they were cute enough for toddlers to be interested in them. Wrong, obviously. You should have seen my Little Miss playing with the body BEFORE I added ears, eyes and mouth...she was basically playing with a stuffed sock with legs...but, for once, the finished toy didn't end up in kids' hands. Instead, Mr Tango bravely flew a few thousands miles today to reach my little sis as a birthday present. :)
If you want to make your own sock monkey, good, step-by-step instructions can be found on Craft Passion's blog here.
This is a fun, one-evening project that can be easily done with used or new socks (I used new, Pound Shop socks, simply because my husband's socks are all block coloured and I was looking for stripy ones). I had fun deciding the expression of the monkey, all really down to the eyes, so I suggest you try a few eye types / styles (buttons, felt, big round, small embroidered...) and experiment a bit, until you are happy with it.
I also added a touch of femininity with the scarf, made out of a piece of particularly fancy ribbon. Another slight change from the tutorial I followed was not stuffing the tail; I just couldn't face stitching along the whole length of the tail and then turning the tail inside out...I think it turned out pretty sweet anyway.
Happy birthday Cele, love you loads... I know you'll make Mr Tango happy! X
Thursday 31 January 2013
Monday 21 January 2013
Earphone tidy and cosy...how to solve the tangled wire issue
Dear friends, isn't it wonderful when outside it is snowing and you are on the sofa, ready for guiltless rubbish TV?? What happens when, instead, your TV only shows you THREE channels, sort of 1950 style, due to lack of signal in your area and the most interesting programme of the lot is a snooker match??? What do you do? Well, in my case, I came up with a earphone tidy and cosy! Since I made my iPad cover (yes, I know, I still have to write to you about it...), the "tangle earphone wire" issue has been bothering me big time. I failed to think about a closure to the back pocket of my iPad, so the earphones, which I keep there, often fall in my bag and become a mess in no time.
So tonight, while a very exciting snooker match was shown on TV, I took all my scraps of felt and started thinking how to make an earphone tidy and cosy. I was inspired by this little rabbit tidy, but sort of made my own along the way.
So here it is, my earphone tidy and cosy. It looks a little like Little Red Riding Hood to me...
If you want to make one, you'll need:
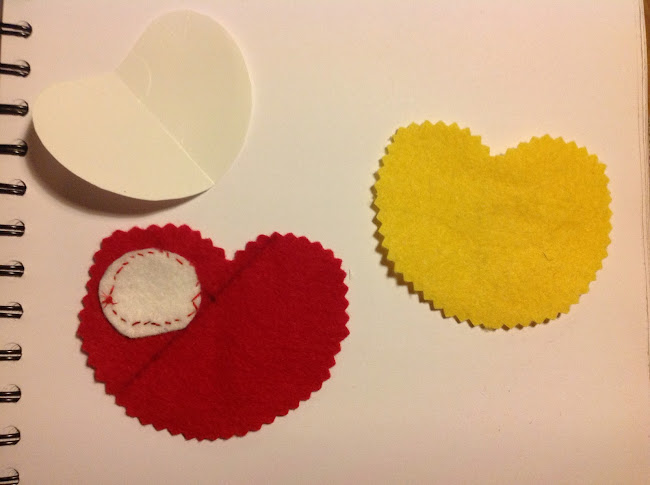
First, cut two hearts out of felt using your pinking shears, one out the red piece, one out of the yellow.
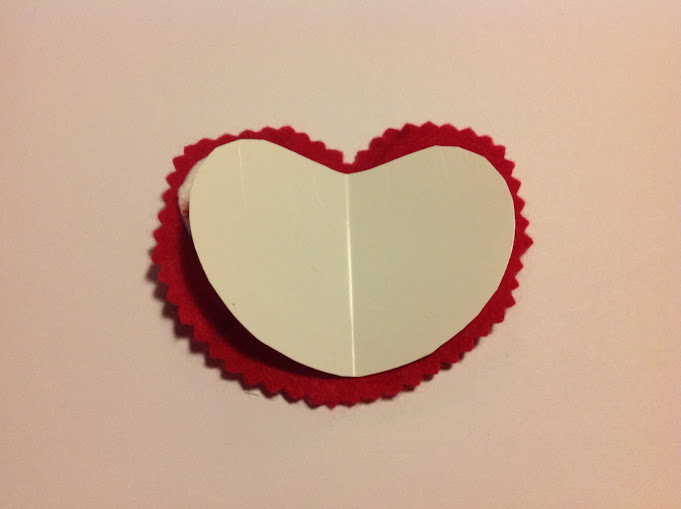 Then cut the plastic bowl; shape it to make the inner support part of the earphone cosy using the template.
 Cut the face out of white felt; this will be slightly larger than the hole to allow it to be sewn at the back.
Sew by hand the white circle to the red heart; I used a simple running stitch.
 Now have fun embroidering the eyes and mouth of Little Red Riding Hood...
 Cut and stitch the heart appliqué (or any other appliqué you like...) on the front of the earphone cosy, and the hair. For the heart I've used blanket stitching, for the hair I have used again running stitching.
 Now place the two snap fasteners on the yellow (inner) part of the cosy, so that they can snap easily leaving space for the earphone wire in the middle. Stitch them to the felt.
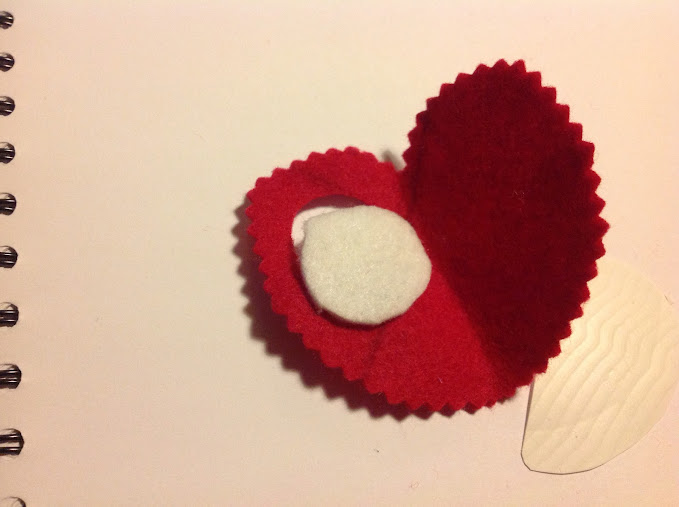
Glue the plastic support to the back of the red heart, centring it so that some space is left all around to stitch the outer and inner felt parts together.
 Then glue the support to the yellow (inner) part.
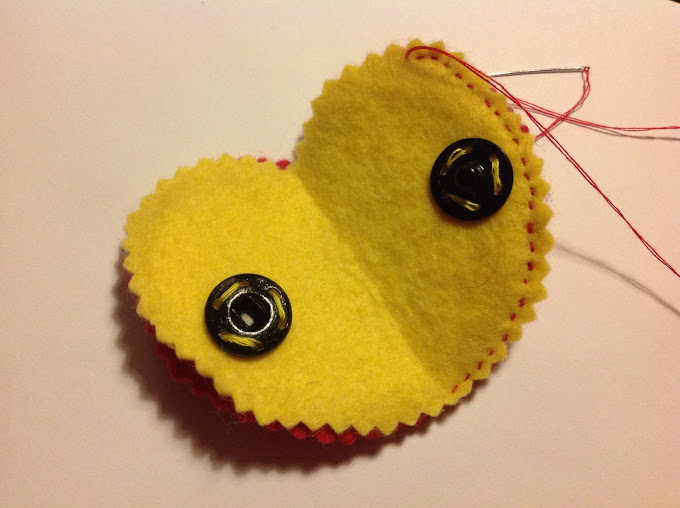 Now stitch all around the felt to secure the two pieces together, using a running stitch.
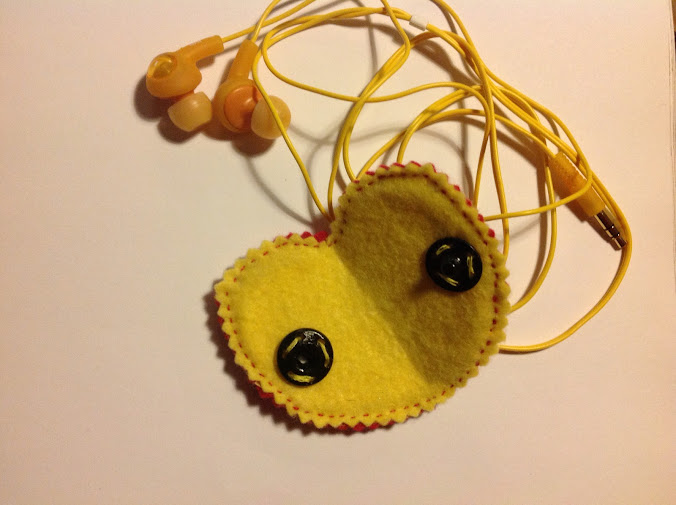 And that is it! I hope you have enjoyed my first tutorial with template; and if you make an earphone tidy and cosy, it would be great if you could post a picture of it on my Facebook page: www.facebook.com/virtagegetscrafty... and don't forget to like it! ;)
So tonight, while a very exciting snooker match was shown on TV, I took all my scraps of felt and started thinking how to make an earphone tidy and cosy. I was inspired by this little rabbit tidy, but sort of made my own along the way.
So here it is, my earphone tidy and cosy. It looks a little like Little Red Riding Hood to me...
If you want to make one, you'll need:
- The free template I have made for you (not for commercial use please!)
- Scraps of felt; I have used red for the outer and yellow for the inner part, pink for the hair, white for the face and blue for the heart appliqué
- A little piece of sturdy but flexible material; I found the perfect material in a plastic disposable bowl. Or you could use some cardboard
- Thread to match
- Pinking shears
- A pair of snap fasteners (or Velcro)
- All purpose glue
 Then cut the plastic bowl; shape it to make the inner support part of the earphone cosy using the template.
Cut the hole in the red (outer) heart through which the face will show.
 Cut the face out of white felt; this will be slightly larger than the hole to allow it to be sewn at the back.
 Now have fun embroidering the eyes and mouth of Little Red Riding Hood...
 Cut and stitch the heart appliqué (or any other appliqué you like...) on the front of the earphone cosy, and the hair. For the heart I've used blanket stitching, for the hair I have used again running stitching.
 Now place the two snap fasteners on the yellow (inner) part of the cosy, so that they can snap easily leaving space for the earphone wire in the middle. Stitch them to the felt.
 Then glue the support to the yellow (inner) part.
 Now stitch all around the felt to secure the two pieces together, using a running stitch.
 And that is it! I hope you have enjoyed my first tutorial with template; and if you make an earphone tidy and cosy, it would be great if you could post a picture of it on my Facebook page: www.facebook.com/virtagegetscrafty... and don't forget to like it! ;)
Sunday 13 January 2013
The "while she sleeps" headscarf
These days I seem not to have much time or energy at all, for anything that is not working, cooking or spending a little time with my family. I noticed with horror that my sewing machine has a greyish layer of dust on it (for that matter, my whole house has a greyish layer of dust - hahaha - no time / energy for cleaning either!). It must be the depth of winter, and I hope I'll de-hibernate soon...
So the only projects I have the strength to see until the end at the moment are those quick 'n' easy you can do in an evening, or "while she sleeps". It's been ages since I sewed something in "instalments".
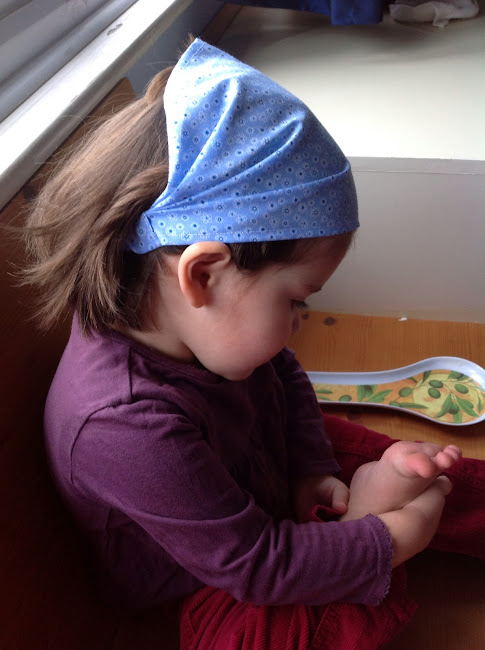
The reason for sewing this headscarf the other night was because my little monkey has a head full of hair, and I mean FULL...she was born with lots of it, her hair grows fast and somehow is always in front of her eyes. And I *love* that boho look a headscarf gives her. Of all the tutorials I could find on the Internet, the headscarf tutorial by Ivy Designs seems to be the clearest, with precise instruction, a range of sizes to choose from, full of nice step-by-step pictures and, last but not least, free...(you can find the tutorial following the link here.)
I think the final result looks quite professional (thanks to the great tut) and it only took me a couple of hours - I'm not the fastest, admittedly...especially since I haven't made friends with my rotary cutter yet, it still frightens me, so I go extra slowly when I have that one in my hands.
The funniest part was taking the pictures. Little monkey is two and a half, do you think she could pose for me nice and still? No, of course. I could only convince her to be still encouraging her to look at the sole of her foot... :) and this is the result:
Nice and simple! This is all we want! And oh...happy new year to you all! X
Subscribe to:
Posts (Atom)
